Cloudinary Uploader
Syed Wahaj
Last Update há 8 meses
Description
🔗 Demo Page: http://chakor-plugin-demo-2.bubbleapps.io/version-test/cloudinary_uploader?debug_mode=true
Easily integrate Cloudinary's media upload capabilities into your Bubble application with the Cloudinary Uploader Plugin. This plugin provides a highly customizable file upload experience, allowing users to upload images, videos, and other media directly to your Cloudinary account.
Instructions
- Sign in into your Cloudinary account. Sign in and navigate to dashboard: https://console.cloudinary.com
- Now you are able to setup the Cloudinary Uploader element itself. Drag it on your page and make sure you populate few mandatory fields.
Secret in your Cloudinary dashboard.
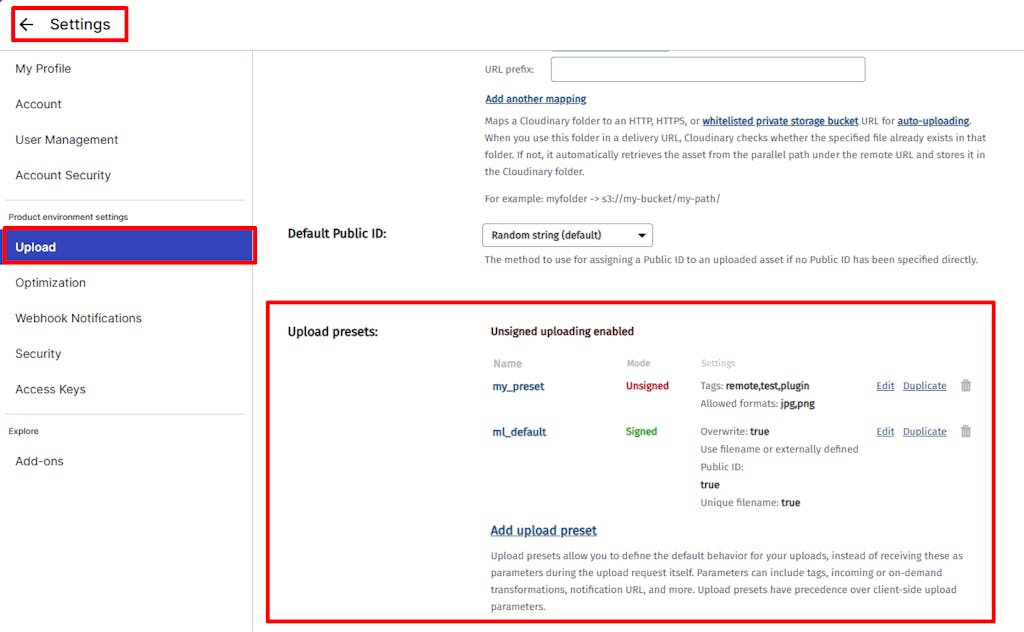
-> Preset Name - presets are workflow on Cloudinary
side that can handle file uploading and act as a
middleware to modify uploaded files. You'll be able
to found your preset name in "Settings -> Upload"
section in your dashboard:
https://console.cloudinary.com/settings
- Make sure to create an unsigned preset in your cloudinary console. After setting up the element with required fields, it is time to test it and open the uploader on a button click for example as shown on this demo page. To do this, you need to use "Open" element action


